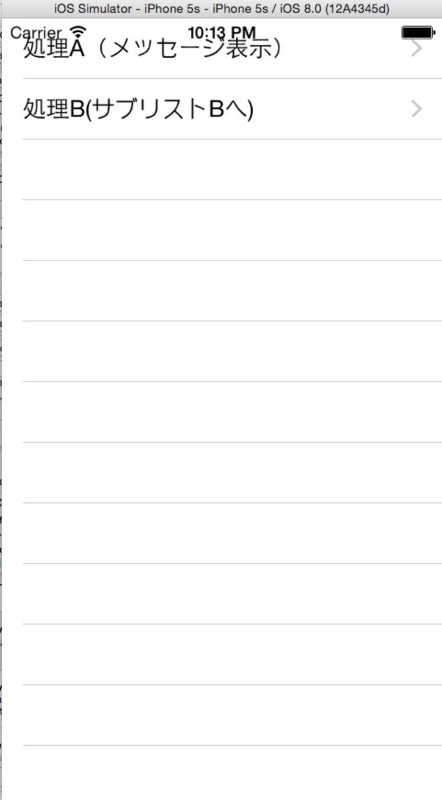
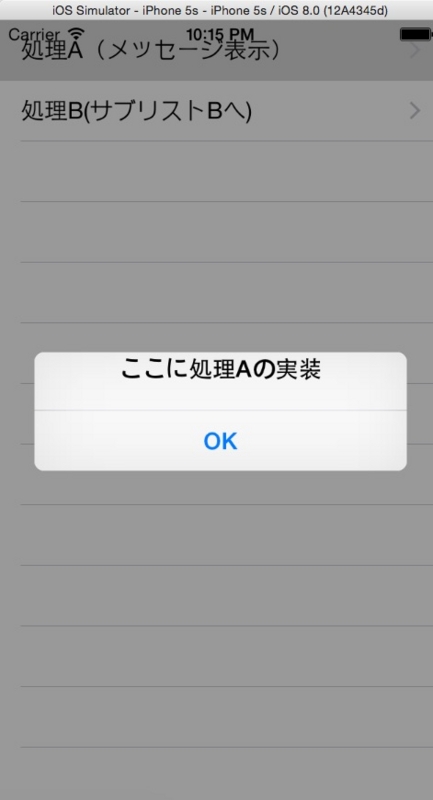
「JavaプログラマがXcodeでiPhoneアプリを作ってみる」の8週目です。
Swiftの開発でビジネスロジック寄りのコードの動作をさっとしたい場合があります。デバッグ用のViewをストーリーボードに作って毎回新しいボタンを付けていたのですが、画面が手狭になったり、規模が大きくなるにつけて掃除をするのが面倒になったりしてきました。xUnitでテストしようかとも思ったのですが、ミドルウェア周りの準備でやっぱり無駄な時間がかかってしまいます。
それで、関数を引数渡しする練習も兼ねて、TableViewの項目をクリックすれば任意の処理を実行できる、簡易ランチャを作りました。思いっきりControllerクラスにオンコードで処理を書いていますが、とりあずストーリーボードを触らなくても実行できるテストが増やせるようになりました。
とりあえず全文
import UIKit

typealias Command = (name:String, body:() -> Void)

class ViewController: UIViewController, UITableViewDelegate, UITableViewDataSource  {

    @IBOutlet weak var tableView: UITableView!

    var commandlist:[Command] = []

    private func addCommand(name:String, body:() -> Void = {}){
        commandlist.append(Command(name:name, body:body))
    }


     //UIViewController
    override func viewDidLoad() {
        super.viewDidLoad()

        self.tableView.delegate = self;
        self.tableView.dataSource = self

        //ここからコマンドリストの作成
        addCommand("処理A",body:{
            //処理A
        })

        addCommand("処理B",body:{
            //処理B
        })

        addCommand("処理C",body:{
            //処理B
        })
    }

     //UIViewController
    override func didReceiveMemoryWarning() {
        super.didReceiveMemoryWarning()
        // Dispose of any resources that can be recreated.
    }

    //UITableViewDataSource
    func tableView(tableView: UITableView!, numberOfRowsInSection section: Int) -> Int {
        return commandlist.count
    }

    //UITableViewDataSource
    func tableView(tableView: UITableView!, cellForRowAtIndexPath indexPath: NSIndexPath!) -> UITableViewCell! {

        let command = commandlist[indexPath.row]

        let cell = UITableViewCell()
        cell.accessoryType = UITableViewCellAccessoryType.DisclosureIndicator
        cell.textLabel.text = "\(command.name)"

        return cell
    }

    //UITableViewDataSource
    func tableView(tableView: UITableView!, didSelectRowAtIndexPath indexPath: NSIndexPath!) {

        let command = commandlist[indexPath.row]
        command.body()

    }
}
解説
名前と関数が組みのタプルを作ります。
ここではCommandと別名をつけました。
typealias Command = (name:String, body:() -> Void)
タプルのリストを作ります。
var commandlist:[Command] = []
画面起動時にタプルのリストに処理を追加していきます。
        //ここからコマンドリストの作成
        addCommand("処理A",body:{
            //処理A
        })

        addCommand("処理B",body:{
            //処理B
        })

        addCommand("処理C",body:{
            //処理B
        })
クリックされたらタプルの関数を実行します。
    //UITableViewDataSource
    func tableView(tableView: UITableView!, didSelectRowAtIndexPath indexPath: NSIndexPath!) {

        let command = commandlist[indexPath.row]
        command.body()

    }
さらに解説
Commandの関数でタプルのリストを変更することにより、画面に表示されているコマンドを変更することができます。
これを再帰的に行えば、大カテゴリの一覧を表示 > 小カテゴリの一覧を表示 > 各項目のプロパティの一覧を標示 といったことができるようになるので、業務的なアプリのテスト実装だと割とこれだけで間に合ったりします。
     //UIViewController
    override func viewDidLoad() {
        super.viewDidLoad()

        self.tableView.delegate = self;
        self.tableView.dataSource = self

        changeMainList()
    }

    func changeMainList() {

        commandlist.removeAll(keepCapacity: false)

        addCommand("処理A(メッセージ表示)",body:{
            var alert = UIAlertView()
            alert.message = "ここに処理Aの実装"
            alert.addButtonWithTitle("OK")
            alert.show()
        })

        addCommand("処理B(サブリストBへ)",body:{
            self.changeSublistB()
        })

        self.tableView.reloadData()
    }


    func changeSublistB() {
        commandlist.removeAll(keepCapacity: false)

        addCommand("サブリストB [1項目]", body:{/*クリックしても特に何もしない*/})

        addCommand("サブリストB [2項目]", body:{/*クリックしても特に何もしない*/})

        addCommand("戻る", body:{
            self.changeMainList()
        })

        self.tableView.reloadData()
    }


